


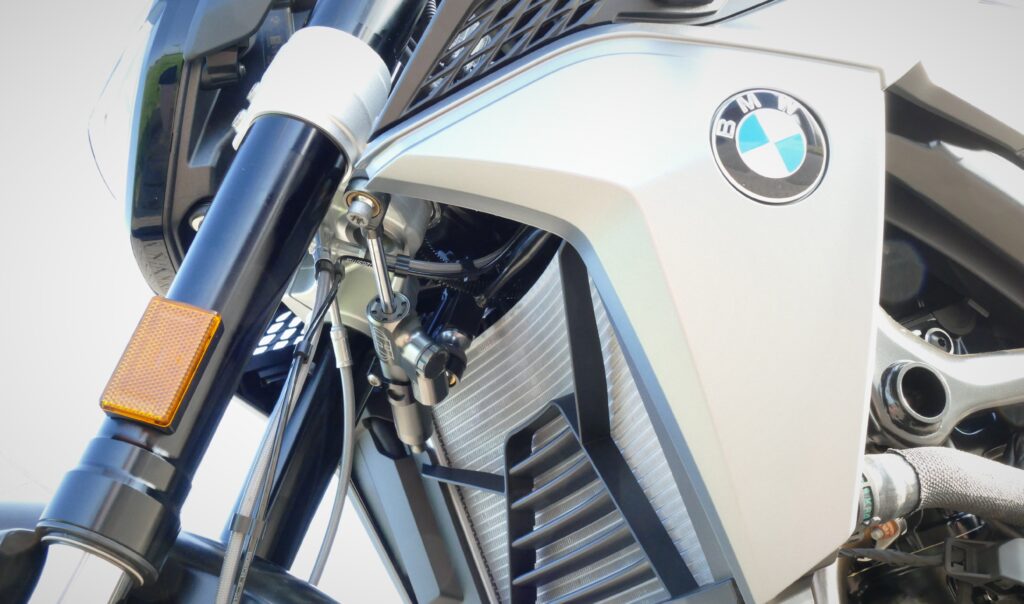
Installing a steering damper does not require a large collection of specialist tools. In most cases, a standard set of metric hex keys (Allen keys), a torque wrench, and basic spanners are enough to complete the job. The exact toolset depends on your specific motorcycle and the type of mounting kit used, but the process is designed to be accessible for a mechanically confident home mechanic.
The key factor that determines how straightforward the installation is comes down to whether you are fitting a bike-specific kit or a universal one. Bike-specific mounting kits are engineered to bolt directly onto existing frame points, which keeps the tool requirements minimal and the process predictable. The sections below walk through the most common questions riders have before picking up a spanner.
What tools are typically required to install a steering damper?
For most steering damper installations, you will need a metric hex key set (Allen keys), a torque wrench, a set of open-end or combination spanners, and thread-locking compound such as Loctite. Some kits may also require a socket set for access to recessed bolts. No drilling, cutting, or fabrication tools are needed in the vast majority of bike-specific fitments.
Here is a practical breakdown of what to have on hand before you start:
- Metric hex key set – most damper mounting bolts use Allen-head fasteners in sizes ranging from 4 mm to 8 mm
- Torque wrench – tightening fasteners to the specified torque is important for both safety and preventing damage to mounting points
- Combination spanners – useful for holding one side of a bolt while tightening the other
- Thread-locking compound – applied to fasteners that are subject to vibration to prevent loosening over time
- Socket set – helpful for certain bracket positions where a spanner cannot reach cleanly
- Cleaning materials – wiping mounting surfaces before fitting ensures a clean, secure contact
If your kit includes a pre-drilled CNC bracket designed for your specific model, you will not need any measuring tools, templates, or cutting equipment. The bracket aligns with existing holes on your frame or triple clamp, making the process comparable in complexity to fitting a set of handlebars.
Does the required toolset change between steering damper types?
Yes, the toolset can vary slightly depending on whether you are fitting a linear or progressive damper, and more significantly depending on the mounting configuration. The damper unit itself installs in the same general way regardless of type, but the bracket geometry and attachment points differ between models, which can influence which sizes you reach for most.
Linear dampers, such as a constant-rate unit, and progressive dampers, such as a reactive-rate model, both attach to the steering head area using similar hardware. The main variable is the bracket design. Some brackets attach to the triple clamp, others to the frame. Each configuration may call for slightly different spanner sizes or socket depths, but none should require tools beyond a well-stocked basic metric set.
If you are fitting a steering damper with an adjustable body, you may also want a flat-bladed screwdriver or a small adjustment knob tool to set the damping level after installation, though this is an adjustment step rather than part of the physical mounting process.
What’s the difference between a bike-specific and universal steering damper kit?
A bike-specific steering damper kit includes a CNC-machined mounting bracket engineered for one particular motorcycle model. It bolts directly onto existing frame or clamp points with no modification required. A universal kit uses adjustable brackets that can be adapted to fit a range of motorcycles, but typically requires more measuring, fabrication, or drilling to achieve a clean and secure fitment.
The practical differences matter a great deal when it comes to installation time, tool requirements, and the final result:
- Bike-specific kits align precisely with existing bolt holes, require no drilling, and come with all necessary hardware included. Installation is straightforward and the result looks factory-fitted.
- Universal kits offer flexibility across multiple models but demand more skill and time. You may need to source additional hardware, measure clearances carefully, and in some cases modify existing components.
- Finish and aesthetics differ noticeably. Bike-specific brackets are typically finished to match the motorcycle’s hardware, whereas universal options are often more utilitarian in appearance.
- Fitment confidence is higher with a model-specific kit because the geometry has been tested and validated for your exact motorcycle.
For most riders, a bike-specific kit is the more practical choice. It reduces installation complexity, lowers the risk of incorrect fitment, and typically produces a cleaner end result. You can browse the full range of available motorcycle suspension products to find fitment options for your model.
Hyperpro
Ride with confidence
Find the nearest Hyperpro dealer and start your motorcycle upgrade.
Should a steering damper be installed by a professional?
A steering damper can be installed at home by a mechanically capable rider, provided the kit is bike-specific and comes with clear instructions. However, because the damper connects directly to the steering assembly, any fitment error can affect handling and safety. If you are not confident working on your steering head area, having a qualified technician install it is the sensible choice.
Consider the following when deciding whether to install it yourself or seek professional help:
- Your mechanical experience – if you have successfully fitted handlebars, levers, or other steering-area components, a damper installation is within reach
- The quality of the instructions – a well-documented, model-specific kit with torque specifications and step-by-step guidance significantly reduces the risk of error
- Torque requirements – fasteners in the steering area must be tightened to precise values; guessing is not acceptable here
- Post-installation check – regardless of who installs it, always verify full steering lock in both directions and confirm no cables or hoses are restricted before riding
A professional installer will also be familiar with model-specific quirks, such as limited clearance around the triple clamp or the routing of brake lines, which can save time and prevent frustration.
How is a steering damper adjusted after installation?
After installation, a steering damper is adjusted by turning the damping adjuster, typically located at one end of the damper body, to increase or decrease resistance. Most adjustable dampers use a numbered click system. Start with a low to mid setting and test the steering feel at low speed before riding at pace. Fine-tune from there based on how the bike responds.
The goal of adjustment is to find a balance where the damper controls unwanted wobble and tank-slapper behaviour without making the steering feel heavy or slow to respond. Here is how to approach it systematically:
- Set a baseline – begin at a mid-range position, for example position 11 on a 22-position adjuster, so you have room to go firmer or softer
- Test at low speed – ride slowly through a car park or quiet road to feel how the steering responds; it should feel natural, not stiff
- Test at higher speed – assess stability over uneven surfaces and during acceleration; the damper should reduce any nervous feedback without fighting your inputs
- Adjust incrementally – make changes of two to three clicks at a time rather than jumping between extremes
- Revisit after different conditions – some riders prefer a slightly firmer setting for motorway riding and a softer setting for tight, technical roads
A damper that is set too firm will make the steering feel vague and slow, which can actually reduce confidence rather than build it. A setting that is too soft will not provide enough resistance to prevent instability at speed. Finding the right position for your riding style and road conditions is a short process that pays off immediately in feel and confidence.
How Hyperpro helps with steering damper installation
We design our steering dampers and mounting kits specifically to make the installation process as straightforward as possible, without compromising on performance or safety. Here is what sets our approach apart:
- Model-specific CNC mounting kits – engineered for your exact motorcycle, requiring no drilling or cutting in 98% of applications
- Two damper systems to suit different needs – the CSC (Constant Safety Control) linear model for consistent damping, and the RSC (Reactive Safety Control) progressive model for damping that adapts to steering speed
- 22-position adjustability – both systems allow precise fine-tuning so you can dial in the feel that suits your riding style and conditions
- Plug-and-play fitment – our kits are designed to use existing mounting points, keeping the tool requirements minimal and the process accessible
- Available in Hyperpro Gold or Black finish – so the hardware complements your motorcycle’s appearance as well as its performance
If you have questions about which system fits your motorcycle or want guidance before purchasing, get in touch with us. To buy, visit your nearest authorised distributor through our dealer locator.